


Side Table Revamp
I love finding new ways to use something old so recently I decided to do a side table revamp. I had this using in my office that was a bit drab! I have soft colours in my office now so I decided to do a side table revamp by repainting it white and adding a spot (or line in this case), of colour!
This project really cost me next to nothing because I used paint from the garage and a tester pot that I got for kitchen colours that was lying around. So next time you want to take our the credit card to buy a new piece of furniture in your home, look at what you’ve already got that could be used.
How did I do this side table revamp:
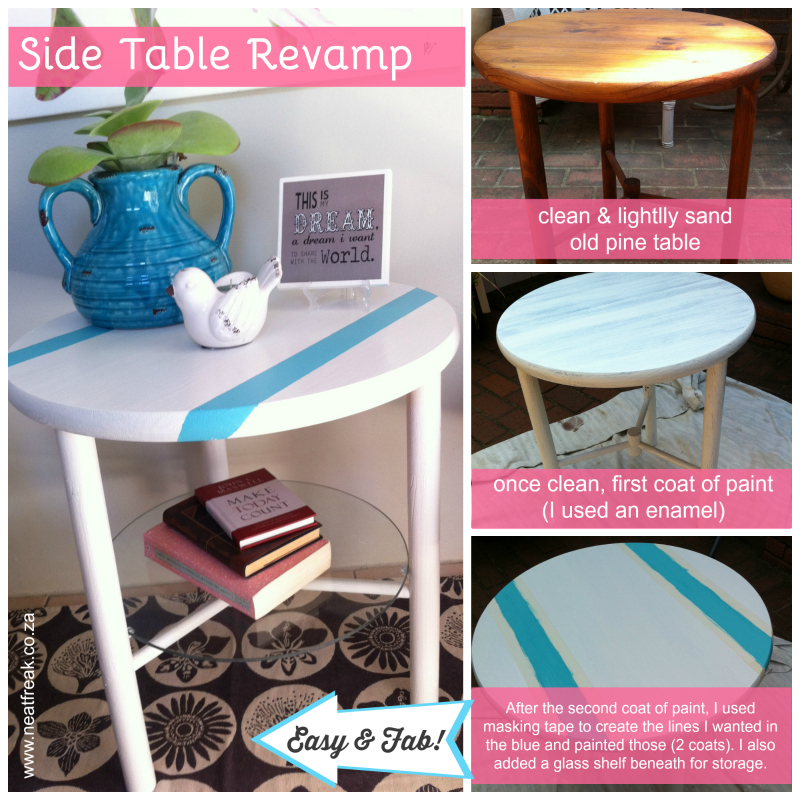
1. I sanded the pine table lightly going with the grain of the wood. If you sand it in all different directions, you may find that you see these strokes once the paint is applied.
2. Once that was done, I brushed off all dirt and dust from the sanding and applied my first coat of paint. I went with an enamel as I wanted a smooth finish that would be easy to clean.
3. Since the paint I was using was nice and thick, I only needed to apply two coats of paint . Depending on your table, how well you’ve sanded it and the quality of your paint, you may need to give it three coats.
4. As this table was going into my office, I wanted to bring in some blue to tie in with the soft blue on my walls. To do this, I measured and marked where I wanted the lines and then applied masking tape in those areas. I applied two coats of paint here using a small paint tester pot that I had.
5. Before you pull any masking take off, make sure you’ve allowed the paint to dry thoroughly. You don’t want to pull off the tape and have the paint smudge or pull off too!
6. To add the glass shelf to the bottom, I made holes just above each leg - large enough to accommodate plastic shelf support studs.
7. I had a piece of glass cut to fit the inside diameter between the legs (NOT the top of the table).
8. The shelf was placed on the inside of the legs, providing me with additional storage.
www.neatfreak.co.za


No comments yet.